")
Last Updated on January 30, 2023 by Rose Morah
Whether you are traveling abroad, going on a road trip, or visiting the countryside, you need to stay connected.
Personally, having high-speed internet has always been at the top of my priorities whenever I am traveling. But over the past few years, I have had my fair share of challenges and made a ton of mistakes when it comes to high-speed internet access.
In this article, I will share some of the best tips for getting high-speed internet when traveling.
1. Use free DNS for high-speed internet wifi
Have you been in a situation where you have subscribed to the best internet provider, with the fastest internet speed, but for some reason, your internet is still slow?
Personally, I have experienced this countless times. I could switch internet providers every other month. But the problem never went away.
I, later on, realized that the slow internet connection was not from the internet providers but from my DNS server!
There are free DNS servers that help boost your internet speed depending on your location.
But before we dive into servers, check out my internet speed test before and after changing my DNS server.
| SPEED TEST | Ping | Downloads | Uploads |
| BEFORE | 9.3 | 228.31 | 11.19 |
| AFTER | 6 | 219.37 | 11.12 |
See also: 5 Best Portable WiFi Hotspots for Travel.
Free DNS servers
To stay connected to all my devices, I always travel with a portable travel router.
I mostly use the Free Cloudflare DNS server or sometimes interchange with free Google DNS in case my internet speed starts to slow down.
Cloudflare is my personal favorite because it not only gives me improved internet speeds when traveling but also malware protection. You can try it out here for free.
But if you prefer the Google DNS server, which is also free, you just need to search Google DNS on your browser and it will give you the best servers based on your location.
It is also worth mentioning that though changing your DNS server will help boost your internet connections while traveling, it does not mean that your internet will be faster than your internet plan.
How do you change your DNS server?
To change your DNS server follow the following steps if you’re using an internet router.
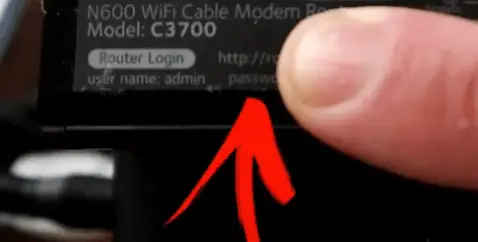
- Check the stickers or the information provided on your router, to get your username and password if don’t have them.
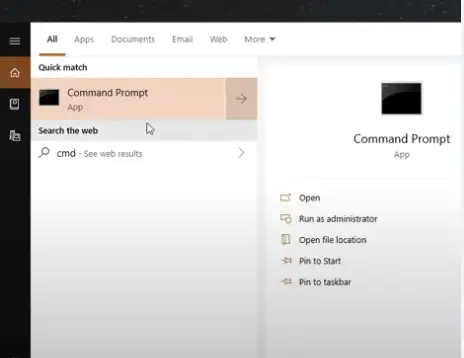
2. Go to your PC and search “command prompt”.
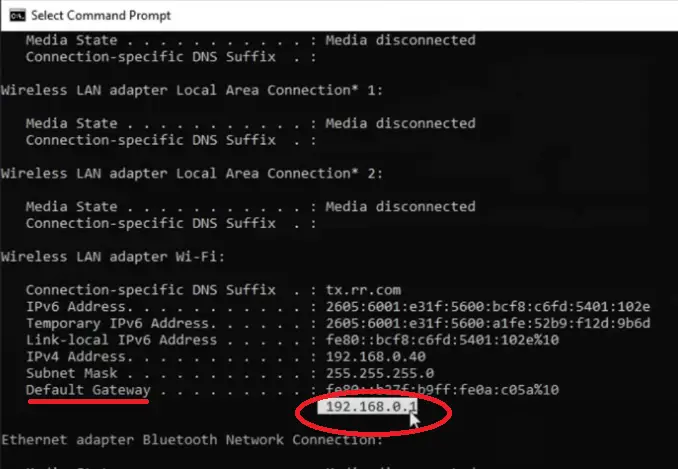
3. Type “ipconfig” then press enter.

4. On the results, scroll down to Default Gateway and copy the IP address provided.
5. Go to your web browser and type the IP address and search.
This will automatically take you to your router settings.
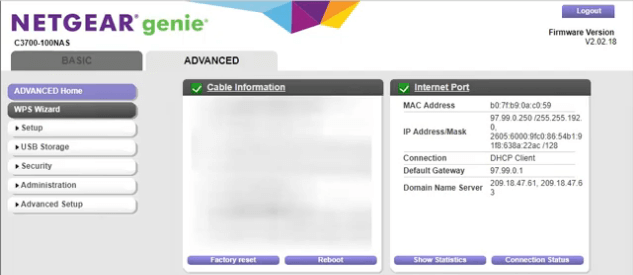
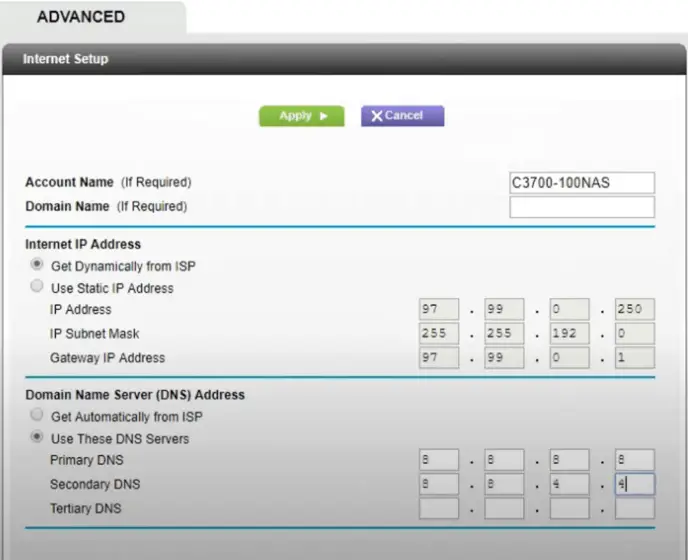
6. Go to the Setup menu and click on “Internet Setup”.
7. Then add your DNS server. Remove the router’s DNS and replace it with either Cloudflare, Google DNS server, or whichever you prefer.

2. Change your windows settings
Changing your windows settings could help boost your internet speed by up to 90%!
(i) Change your windows bandwidth limit
Did you know your windows may be limiting your bandwidth?
Well, my bandwidth had been set to 20% by default on my windows 10. But I lowered it to 5%, which eventually improved my internet speed.
The image below shows my windows bandwidth limit before changing it.

You may also like: How to Find Overlanding Trails (Best Tools & Resources for Finding Trails).
To check your bandwidth limit on windows, follow these instructions.
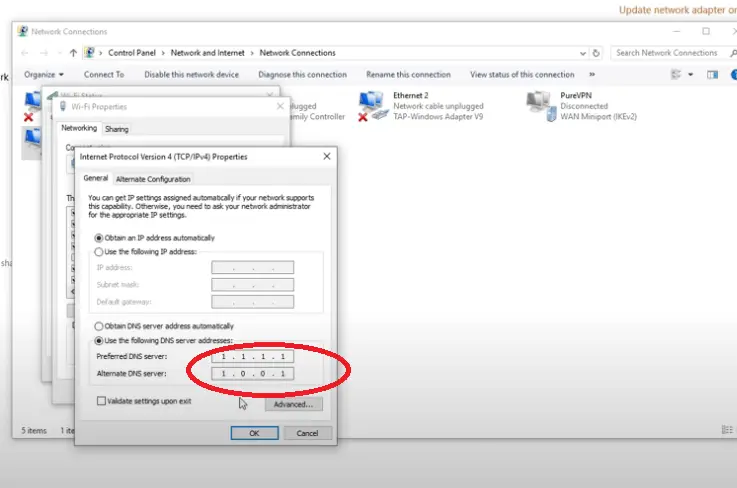
(ii) Change your DNS on the windows settings
To change your DNS on your PC, follow the following steps:
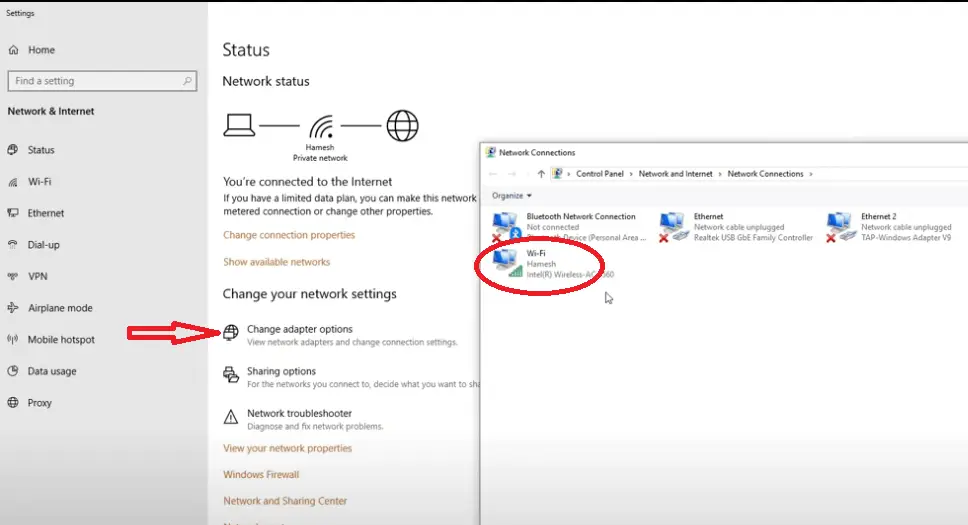
- Go to your network settings on your PC.
- Click on the ‘change adapter option’, and click on WI-FI as seen in the screenshot below.
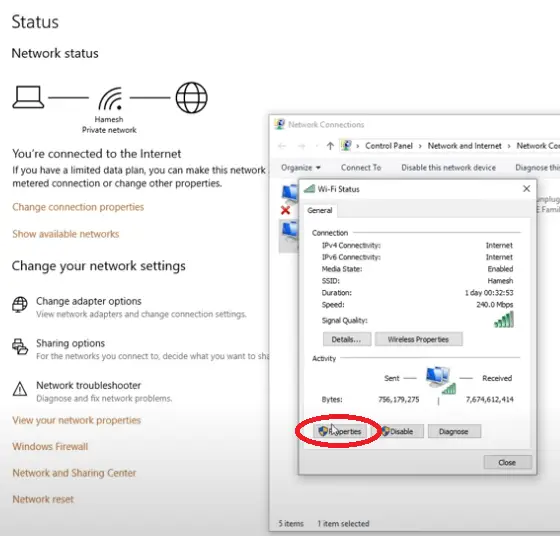
3. A dialog box will appear. Click on “properties”.
- On the “properties”, look for “TCP/IPv4”.
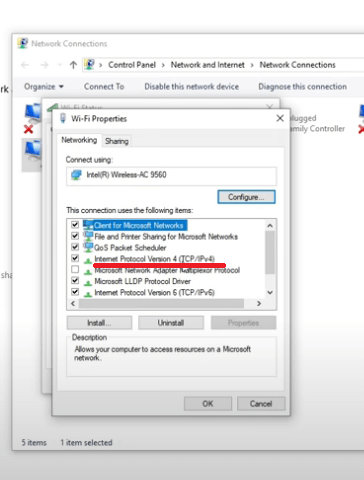
- Click on it, then change your DNS to whichever one you prefer – Cloudflare or Google’s DNS.
| To get other free DNS, search “free DNS” on Google to identify the best one that works for you. |
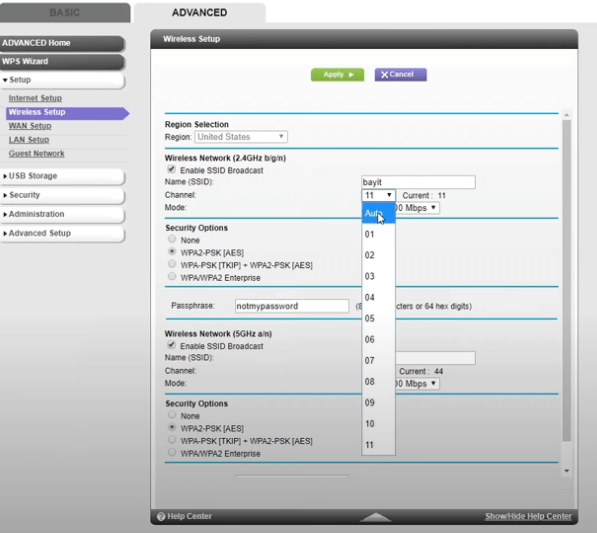
(iii) Change your wi-fi channel to avoid congestion
Changing your windows settings WI-FI channel can help boost your internet speed, especially during peak hours.
Here is how to change your WI-FI channel from your windows settings:
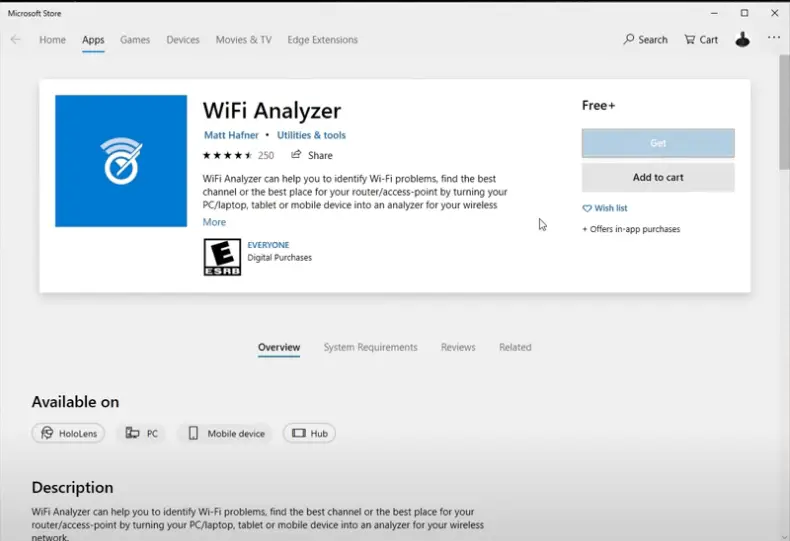
- On your windows search button, search for “Wi-Fi Analyzer”. If you don’t have the app, it will give you the option to install the app, as seen below.
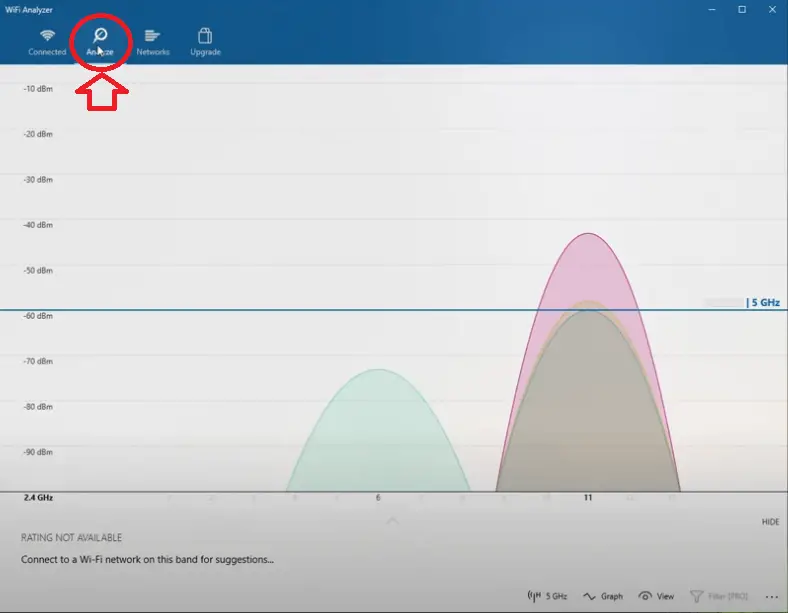
Once installed, open the app and click on “analyze” to see the channels on your WI-FI.
- Next, click on the “Network count” and “SSID” on the view icon as seen in the image below.
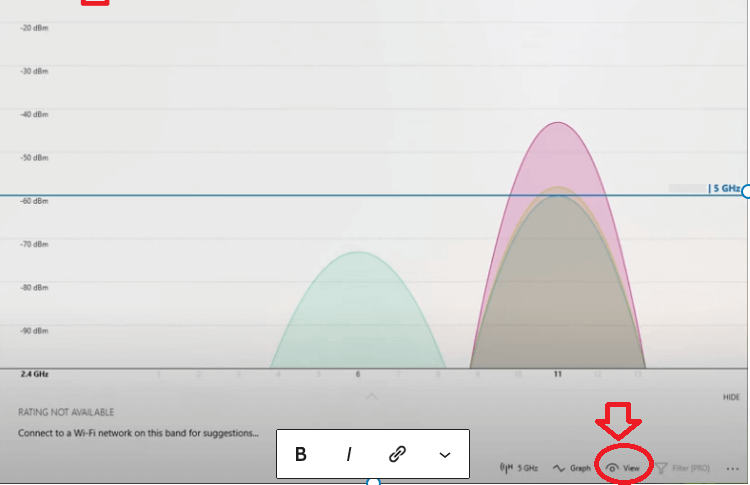
- The results will show you the congested networks and the one you are currently in. As you can see in the image below, channel 11 has more users compared to channel 6.

Therefore, you will need to change your channel to one that is less congested.
On your router settings, you will click on the wireless setup, then the channels option to select the less congested WI-FI channel.
(iv) Disable the background apps
Go to your windows settings and disable the apps that you are not using. This will help speed up your internet connection.
3. Stay Up to Date
I remember using an older PC and my WI-FI card was also not up to date. But after upgrading the WI-FI card and the router to the latest WI-FI specs, the internet speed shot to 230 Mbps from 90Mbps on a 200Mbs plan!
4. Get an appropriate antenna for your portable hotspot
An antenna gives you a better internet connection but only when you connect an appropriate antenna.
As a matter of fact, people buy antennas to improve their internet connection only to end up disappointed.
So, what’s the appropriate antenna for your portable hotspot?
- Make sure you buy an antenna version that is compatible with your carrier. You can do this by checking if the frequency bands used by the booster/antenna match that of your carrier.
- Ensure that you are buying from a trusted brand because there are many companies that sell very poor-quality antennas that will degrade your internet connection.
5. Get a high-speed internet provider
Having a high-speed internet provider helps boost your internet speed.
The following are the best mobile hotspot plans that provide unlimited data based on my experiences.
AT&T DataPro 5GB Hotspot plan
I have in the past experienced a good internet connection with AT&T DataPro 5GB Hotspot plan. The plan gives you more than 30,000 AT&T mobile hotspots nationwide, which you can connect to on all your devices.
See List of Countries Included in AT&T International Calling.
You can check out the plan here.
Cricket Wireless
This plan is not only affordable but also offers good internet connections, especially when traveling across the US border and Canada.
You can check it out here.
Verizon
I have used Verizon when traveling to the rural parts of the country because I realized that it has better connections compared to others that I have used before.
See List of Countries Covered by Verizon International Plan.
Get a good portable wifi device for travel
Having a portable Wi-Fi hotspot is one of the best options when traveling abroad and one still needs to stay connected. This helps you avoid expensive roaming charges.
Additionally, Wi-Fi devices are convenient and secure.
This means you can easily connect from anywhere, and even log in to your bank account without the fear of your account being hacked or frozen.


")