")
Last Updated on July 12, 2022 by Rose Morah
I have once been a victim of buying used travel trailers that I ended up regretting. However, over the years, I have figured out how to properly inspect a used trailer when purchasing.
This article will save you time, money, and regrets that come with buying a used travel trailer.
The article shows you how to inspect both the exterior and interior of a used trailer for hidden damages before buying.
Here is what we are going to cover:
- What to stay away from when inspecting.
- What you should carry when going to inspect a travel trailer.
- How to inspect a travel trailer, and how to spot the red signs.
But before that, here is what I wish I knew before buying a travel trailer:
- I wish I studied the trailer before going to inspect it.
I recommend taking your time to study the trailer that you are going to buy, both on the inside and out.
You can also do this online to be fully aware of its features.
Take a look at photos of the interior and exterior of the travel trailer when new.
Be sure to also read and watch its YouTube reviews.
All this will be important because when you will be going to inspect/buy it you will easily spot the differences.
If you spot something different, that should be the first red sign.
- Before you begin inspecting, make sure you ask the right questions.
Here are a few of the questions to ask the current owner:
- How long do they store the trailer?
- What’s their lifestyle?
- Where have they traveled with it?
- How much time do they spend on their trailer?
These questions will help you to know how much the seller is connected to the trailer.
So, judging by how they respond, if they seem like they do not have a connection with that trailer, then that would be a red sign.
Why?
Because they may not be the real owners, hence they may not know what damages might be on the trailer, or they may have not taken good care of the trailer e.t.c
| NOTE: Any repair that you are going to do after purchasing doubles the time and money you are going to use on the camper trailer. |
| Related: 10 Things To Know Before Buying A Travel Trailer. 30 Travel Trailer Must-Have Accessories. Best Travel Trailer Brands (According To Travel Trailer Owners). |
Let’s now dive into used travel trailer inspection.
What to stay away from?
- A travel trailer that seems to have so many repairs. The seller may be trying to sell you their problems.
- Excessive water damages. If you are buying a travel trailer that has water damage, you may end up spending most of your money on repairs.
- A seller that does not know anything about the trailer or gives you wrong information.
You can only tell that they are feeding you with wrong information if you studied the trailer before showing up.
And don’t forget some sellers will also give you inaccurate information just to sweeten the deal.
I remember once I bought a used trailer that had most of the things that influenced my purchase not as I was originally told.
It is also worth noting that during the inspection, you will spot some things that will actually need repair.
This means that you will have to look at the offer price and compare it with the repair costs then figure out if it is worth buying or not.
A travel trailer may have a good price but have damages that cost much to repair.
Well, the water pump and tank valves can be easy and cheap to replace, of course depending on your budget.
However, the AC, fridge, generator, water heater, and roof are very expensive to replace/repair.
Additionally, an extremely damaged roof, one that will need a replacement, will cost you a lot of money to replace.
| You might also like: |
|---|
10 Best Road Trip Planner Apps/Websites (As Recommended by Travelers). 5 Best Portable WiFi Hotspots for Travel. |
What to Carry when going to inspect a used travel trailer before buying
- Carry a torch to help see the nooks and crannies of the interior of the camper.
- Carry your phone to take the video and pictures of the interior and exterior. This is important because when you get home you can go through them all over again to see what you might have missed, and help you make the right decision.
- Carry gloves. Because you will be touching things that you wouldn’t want to touch with your bare hands.
- Carry a ladder for climbing on top of the roof.
- Bring some extra clothes because you will get dirty when going under the trailer.

| Do this before going to inspect the travel trailer: |
|---|
1. Ask the seller to turn on the fridge the night before. Most fridges take longer to cool down. This is to save you time the following day when checking the fridge’s temperature. 2. Ask the seller to fill the water, gas, and propane tanks. Chances are, they might be empty. |
Next, you are going to:
- Review the owner’s manual and service records.
- Find out when the tires were last replaced.
- inspect both the interior and exterior.
What to look for when buying a used travel trailer
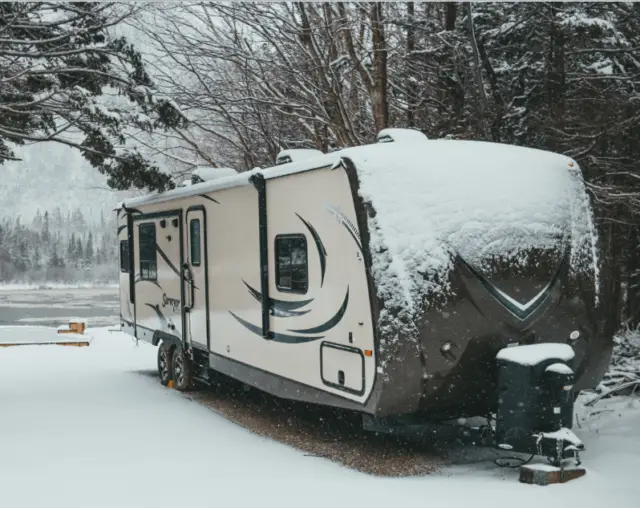
Inspect the exterior of the trailer
1. Check the Roof
The roof is usually the best place to start your inspection.
Why?
Because it gives you a better idea of where to check when you start to inspect the interior of the camper.
For instance, any sign of damage spotted on the roof can direct you to the interior areas that need you to be keen on when inspecting.
This means that you will have to bring a telescoping ladder to climb to the top of the roof for a clear birdseye view of the travel trailer.
Here are things to check on the roof of the travel trailer:
- Look for bowing on top of the roof.
Bowing mainly affects travel trailers that are located in places that receive lots of rain and snow.
Bowing occurs when rainwater or snow is not properly cleared from the roof or is left to stay there for a long time.
So, why is it important to check for bowing on the roof?
Bowing causes water leaks from the roof when it is raining.
- Check if the roof is clean
Be sure to check if the roof is clean.
For example, does it have stains from tree saps e.t.c?
This will help you know whether the owner was taking good care of it.
- Check if the roof has repairs.
Check for signs on the roof, such as roof seals, that show that it has previously been repaired.
- Check the vents.
Check if there are cracks or signs of repairs
2. Inspect the skin of the trailer
You will need to look for tears, holes, and dents at the:
- The skin of the trailer.
- Fiberglass.
- Aluminum.
Additionally, carefully look for water damage where the skin is separated from the trailer.
3. Check for mold or UV damage
This mostly affects trailers that have canvas, wood, or fabrics embedded in them. They are mostly hybrid or pop-up trailers. So, be sure to properly inspect it.
4. Check the leaf springs
The best way to check this is by comparing what you see with other pictures of new travel trailers.
This way you are able to tell the difference, and also if the leaf springs are worn out.
5. Check the tires
This is important because if the tires were to blow out on the highway they may end up ripping out your water lines and water tanks.
How to inspect the trailer tires:
- Check if the tires have the DOT number to find out how old they really are. This is because old tires are prone to blowing up when aired up especially after being stored for long. They also have higher chances of falling apart sooner.
| DOT is usually a 4 digit number. > The first 2 numbers indicate the week when the tire was manufactured. > The second 2 numbers indicate the year the tire was manufactured. |
- Check for cracks that usually are at the sidewalls of the tires, especially if they are old tires.
- Check for uneven tire wear.
See also: Tire Pressure Guide: What is the Proper Tire Pressure For Vehicles?
6. Go underneath the trailer
This is the point where you need the extra clothes.
Because you may need to go underneath the trailer to check:
- the wiring
- if there’s rot.
- if the axles are in good condition. For instance, they should not have corrosion e.t.c.
- and to make sure the frame has no cracks and it is not twisted e.t.c.
Note: if the frame is twisted, that could indicate that the trailer has been in an accident. That’s the last thing you would want.
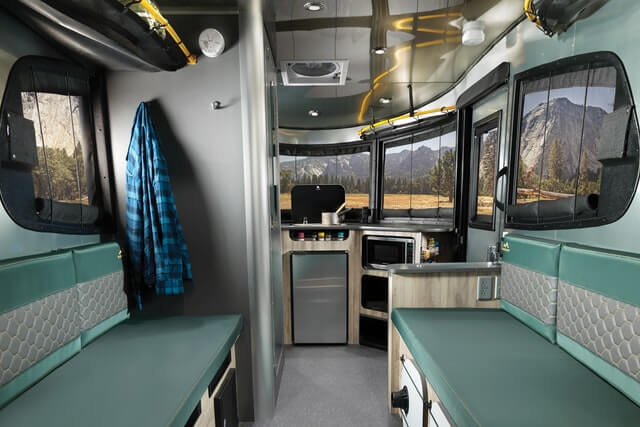
Check the interior of the used travel trailer
1. Check the floor of the trailer
The following are things to check and some red signs when checking the floor of the travel trailer:
- What’s the first impression of the floor?
A lot of buyers have been fooled by new floors. I would recommend doing a thorough inspection of the floor even if it looks new.
Just to offer you a few hints, I would push, step around, and press it looking for the following:
- Floor buckling. You will see humps or uneven surfaces.
- Squishy floor.
- Look at the edges of the floor to check if they are covering water damages.
- Lift the rugs and remove them to check.
NOTE: This inspection also applies even when the floor does not look new.
Additionally, if the floor has carpet or rat fur, just make sure that you thoroughly inspect it by feeling with your hands if there are:
- Bumps.
- Indentions.
- Try to stick your hands underneath it to see if there are molds.
- Closely smell the carpet for mold smell.
Once you notice any of these red signs, head outside and check underneath the trailer.
You will need to properly inspect it for any damages.
You wouldn’t want to buy a used travel trailer with a torn bottom shell. And again, this creates room for mice to invade your camper.
2. Check the interior walls of the travel trailer
Again I would like you to ask yourself, what’s the first impression of the walls?
Does it look like it has been recently painted?
If the answer is yes, then again I would advise you to be extra keen when inspecting the walls.
Why?
Because the seller may be trying to cover the damages.
Some of the (red signs) hints when checking:
- Checking if there are waves on the surface of the wall. This would mean that water is running down the walls.
- Softened drywall.
- Cracked paint.
- Discoloration.
- Check the wood paneling of the trailer.
- Sign of moisture on the wall, especially near the roof.
Additionally, check if the wall paint match.
It can be that the interior wall has one section that looks like older paint.
This could mean that there’s something being covered on the side that seems to have the new paint.
3. Check the windows and roof vents
These are usually the best places to check for water damages in the used travel trailer.
So, be sure to check around the window for soft spots, discolorations, and any sign that water has been there.
Check the vents if they have cracks and other signs.
4. Check for rots from within
Some travel trailers get water-damaged from the slowly dripping water, not from the outside, but the inside.
This could be through the connections to pumps, drains, or the inside water tanks.
Therefore, their floors will rot from within and not outside.
So, be sure to properly inspect under the sink, and check the internal water tanks to see if you can see any water stains around or anywhere that water flows.
| QUICK TIP If you plan to buy a used Scamp or Casita, then carefully check these places mentioned above. |
5. Check if everything works perfectly
First, I highly recommend you get a portable solar generator and hook it up to get power in the trailer. Then proceed to check if everything that requires electricity functions properly.
These includes:
- The lights.
- The refrigerator.
- Shower pump.
Additionally, check if the heater, oven, stove, or anything that requires gas works perfectly.
| Try and make sure that the electronic types of equipment run for longer while the AC is on. You can let it stay on for even up to an hour. |
And don’t forget to check if the toilet works perfectly.
You liked the travel trailer and purchased it. What’s next?
It is recommended you take it to a service facility for trailer frame inspection and also have the LP system checked for any leaks.
How much does a travel trailer inspection cost?
The inspection cost depends on two major factors:
- The size of the travel trailer.
- Whether you want a full inspection or just a specific place.
This article already covers the DIY inspection.
However, I would also recommend using a professional to help you inspect places you have doubts about, especially if you only need to inspect a specific place.
This will be cheaper compared to doing a full inspection.
In conclusion, if you buy the trailer, be sure to document everything, including the changes that you make to it, repairs, and maintenance.
This way in case you want to sell it in the future you will have a better way of showing the buyer why you did what you did, the before and after look e.t.c.


